Creating a base project with Nx + Angular + NestJS
Mayra Rodriguez
Requirements
- Is recommended (not limited) have knowledge about Angular, NestJS, also you maybe must to read about what monorepos are, if you don't know, yo can read this article.
- If you don't know what nx is, you can checkout their webpage here, don't miss this video either. Also you need to install that dependency running
npm install -g @nrwl/cliin your terminal.
In this post I'm not going to include about the integration of BBDD, I'm prefer abstract it to next posts mainly because in that point you can choose between a relational or non-relational DB :). Be attentive to that!
About System and Tools
- This project was made with MacOS Mojave version 10.14.6
- IDE: Webstorm 2020.1
Creating our base project
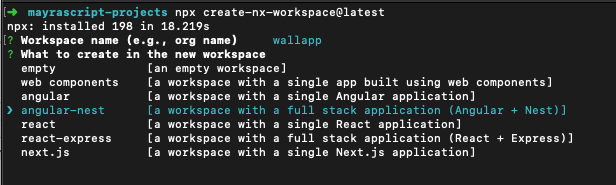
The first thing that we are going to do is create a base project with nx, to do that we must to run the next command in our terminal: npx create-nx-workspace@latest.
Workspace name
Is the name of our organization, in this case a called wallapp which is a funny name that created for a personal project about finances, you can choose whatever you want, but keep in mind, it isn't the name of your web application, for example in my projects, like my personal blog, the organization is mayrascript, but the web application I called mayrascript-web or could be mayrascript-blog or even mayrascript-landing, that is thinking if in the future I have another frontend project for my organization, as example, an admin app, I can called mayrascript-admin. That's my personal convention to differentiate the projects and their purposes, but you can choose whatever you want :).

Selecting the workspace
As you can notice, you can choose an empty workspace or you can select the framework(s) that you need. Don't worry if in the future you want to add more projects to your workspace, you can do it with the nx cli.
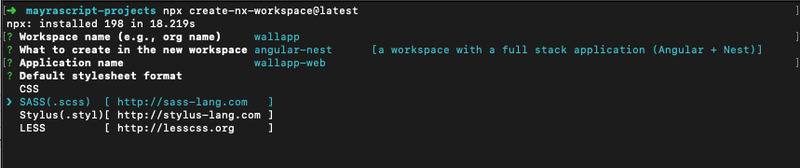
Application name
Is this part we're going to write the name of our frontend application, I choose wallapp-web based in my personal convention.

Stylesheet format
And then we can choose the stylesheet format of our preference.
- Selecting Stylesheet formatThe final step is about if we want to share our data for analytics, I prefer say yes, but feel free to select you prefer option.

- Share data with Google Analytics optionAnd we are ready to explorer and run our project.
You can find more info about how to create a project with nx here.
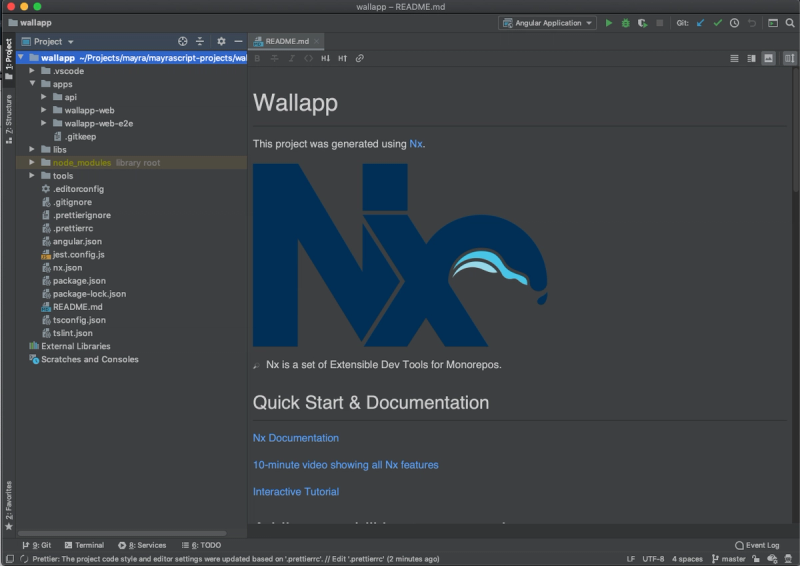
Exploring the project
As you can notice, in the apps folder, we are going to find the frontend project wallapp-web and the backend project api. With the purpose to be short and sweet as posible I'm not going to give a deep explanation about the structure of the monorepo workspace, so feel free to take your time to explore and understand the structure it self, but if you feel you need more introduction about it, you can let me know, I'm glad to create a another post with more details.
Running our project
Running the Frontend
The next step is run for project, to do that we are going to run first our web application, to do that we need to go to our project running in the terminal cd wallapp then we need to run: nx serve wallapp-web
Remember, if you don't havenxprevious install you can runnpm install -g @nrwl/cli
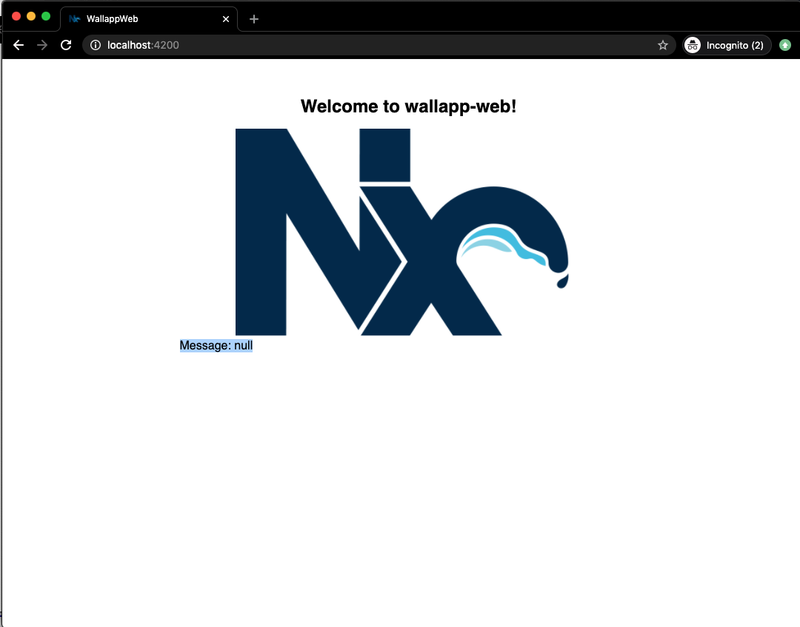
if we go to http://localhost:4200/ we must to see this page:
Running the Backend
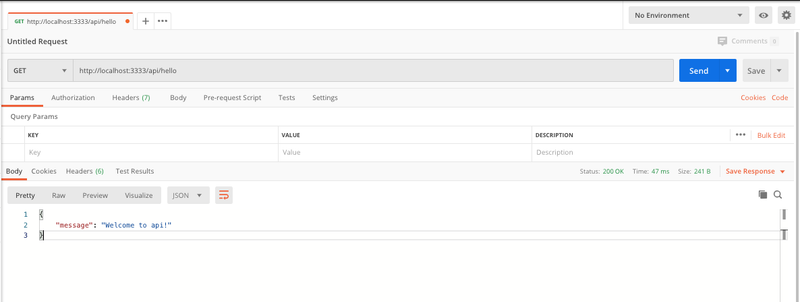
To run the api, we just need to open another terminal window and run there the next command: nx serve api

As we notice, our api is running in localhost in the port 3333. We can test our api using tools like Postman.
Connecting our Backend with our Frontend
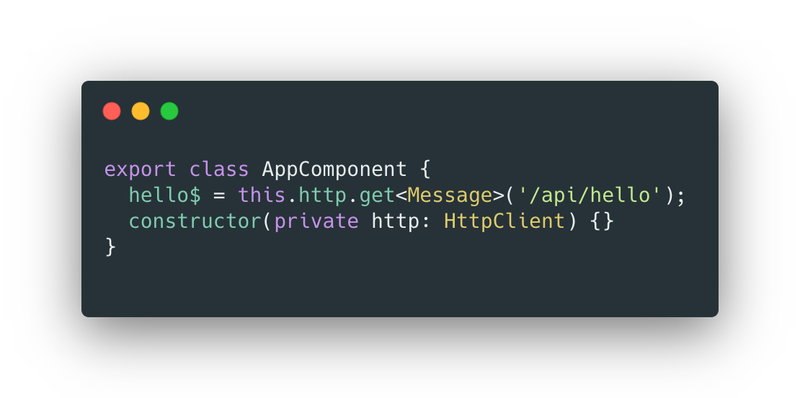
We're almost done!,Nx makes it easy for us!, the base project is already connected with the backend you can check out the app.component.ts.
Nx use a proxy to can connect with the api which is running in other port, you can read more about that here.
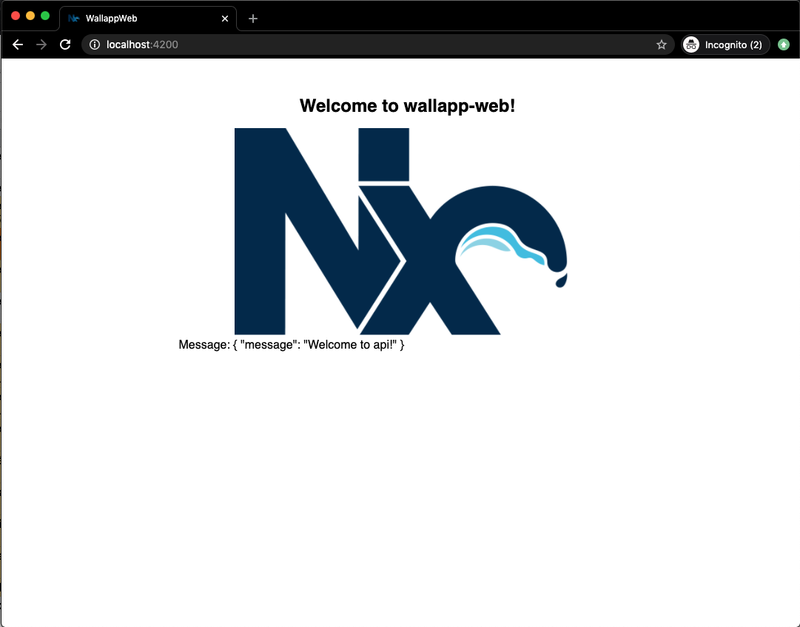
And we can watch by the running project that is displaying the message which came from the backend.
Thank you for your time, And I hope this post was useful for you.